
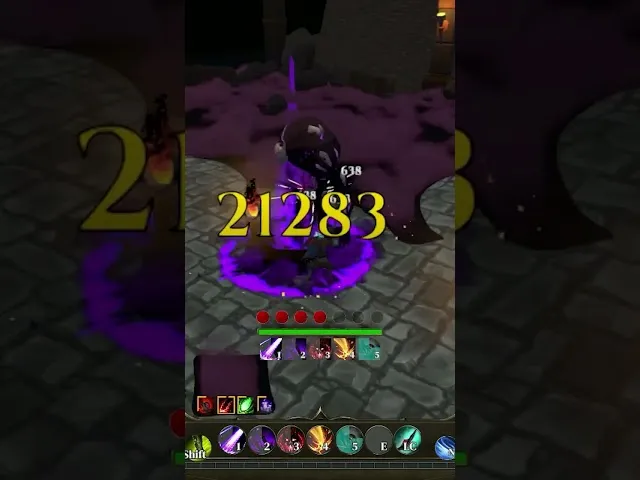
Core Defensive Skill Categories Explained
Surviving the Fading World's brutal late-game encounters starts with understanding how defensive skills work. Because raw healing alone cannot outpace the burst damage of elite packs and named bosses. Defensive skills in this game are split into three core archetypes: shield-based damage absorption, evasion-based dodge windows, and resistance-based damage reduction. Each archetype interacts with the broader skill system in distinct ways, and most competitive players end up blending at least two of them to handle the increasingly punishing late chapters.
The skill tree breakdown walks through every node and its dependencies, but this guide focuses specifically on the defensive branches and how they slot into a working tank build. A properly optimized defensive setup typically pulls from the Bastion cluster for shields, the Veil cluster for evasion, and a small allocation of points into Resolve for percentage-based damage reduction. Players who skip any of these three often find themselves one-shot in chapter 5 boss fights, even with full upgraded gear.
Defensive skills also scale with two stats that newer players frequently overlook: Fortitude and Guard Rating. Fortitude increases raw shield strength and stamina regeneration, while Guard Rating reduces incoming damage by a flat percentage before shields are applied. Both stats are critical for the best skill setup in tank play, and most late-game breakpoints require roughly 240 Fortitude and 180 Guard Rating to function as intended. Pushing either stat past 300 is generally considered overkill because diminishing returns kick in around the 280 mark.
| Defensive Archetype | Core Stat | Damage Mitigation Type | Stamina Cost | Best Use Case |
|---|---|---|---|---|
| Shield Skills | Fortitude | Flat absorption | High | Predictable burst damage |
| Evasion Skills | Agility | Dodge frames | Medium | Fast multi-hit enemies |
| Resistance Skills | Guard Rating | Percentage reduction | Low | Sustained pressure fights |
| Hybrid Layering | All three | Combined | Variable | Endgame tank builds |
Shield Abilities and Damage Absorption Mechanics
Shield-based defensive skills are the backbone of most tank builds because they convert incoming damage into a temporary absorb pool that regenerates after a short cooldown. The most commonly used shield ability is Aegis Guard, which provides a flat absorb value scaling with Fortitude and grants a 1.5-second immunity window at full charge. Aegis Guard sits at the top of the Bastion tree and requires a minimum of 18 points invested in that branch before it can be unlocked, which means players who want to use it need to plan ahead during the early chapters.
The other major shield ability is Bulwark Pulse, which fires a 360-degree shockwave that staggers nearby enemies and grants a 4-second shield to the player. Bulwark Pulse is especially useful in tower defense sections where mobs surround the objective. Because the stagger effect buys time for tower cooldowns to cycle. The absorb value on Bulwark Pulse is lower than Aegis Guard, but the crowd control utility makes it a strong pick for grouped enemy encounters.
| Shield Ability | Base Absorb | Duration | Cooldown | Stamina | Unlock Requirement |
|---|---|---|---|---|---|
| Aegis Guard | 850 + 12/Fort | 6 sec | 18 sec | 45 | 18 pts in Bastion |
| Bulwark Pulse | 420 + 8/Fort | 4 sec | 12 sec | 30 | 12 pts in Bastion |
| Iron Shell | 600 + 10/Fort | 5 sec | 15 sec | 35 | 15 pts in Bastion |
| Reactive Ward | 380 + 6/Fort | 3 sec | 8 sec | 25 | 8 pts in Bastion |
A common mistake new players make is stacking multiple shield abilities without accounting for stamina pressure. Because each shield cast consumes 25-45 stamina, a player who chains Aegis Guard and Bulwark Pulse back-to-back will run dry and become vulnerable during the regeneration window. The skill upgrades guide explains how cooldown reduction and stamina efficiency modifiers solve this problem, but as a general rule, you want to leave at least 30 stamina in reserve between casts to handle emergency dodges.
Utility Skills for Crowd Control and Survivability
Utility skills are the unsung heroes of tank builds because they handle everything shields cannot. Stuns, slows, threat generation, and area denial all fall under the utility umbrella, and they pair beautifully with shield abilities to create layered defense. The most popular utility skill for tank players is Taunt Shout, which forces all enemies within 12 meters to target the player for 8 seconds. Taunt Shout is critical for protecting squishy ranged teammates in co-op and for keeping boss aggro locked during multi-phase encounters.
Another high-value utility skill is Frost Snare, which creates a 6-meter ice field that slows enemies by 50% and deals minor damage over time. Frost Snare is one of the most efficient Sil and the Fading World utility skills because it costs only 20 stamina and has an 8-second cooldown, which means it can be woven into almost any combat rotation. Slowed enemies deal less damage, attack slower, and are easier to keep inside shield absorption windows.
| Utility Skill | Effect | Duration | Cooldown | Stamina | Synergy Target |
|---|---|---|---|---|---|
| Taunt Shout | Force aggro 12m | 8 sec | 20 sec | 35 | Aegis Guard |
| Frost Snare | 50% slow field | 6 sec | 8 sec | 20 | Bulwark Pulse |
| War Banner | +15% team damage resist | 12 sec | 45 sec | 40 | Iron Shell |
| Smoke Veil | 70% miss chance on attacks | 4 sec | 22 sec | 30 | Reactive Ward |
| Chain Hook | Pull enemy to player | Instant | 14 sec | 28 | Taunt Shout |
Utility skills also tie directly into the Sil and the Fading World skill synergies that experienced players build around. For example, pairing Taunt Shout with Aegis Guard creates a 14-second window where the player absorbs incoming damage while all enemies focus on them. Layering Frost Snare on top of that adds crowd control to prevent the aggro'd enemies from spreading out, which is essential during chapter 6 escort missions. The skill combinations overview maps out dozens of these layered rotations, and most tank players settle on 3-4 core combos they rotate through every fight.
Mobility Skills, Evasion Frames, and Positioning
Mobility is the third pillar of defensive play, and it is often the difference between a tank build that feels unkillable and one that keeps dying to environmental damage. The primary Sil and the Fading World mobility skills are Shadow Step, Vault Kick, and Phase Shift. Each one provides a different movement profile, and choosing the right tool for the right encounter is a core skill that separates veteran players from newer ones.
Shadow Step teleports the player 8 meters forward and grants 1 second of invulnerability at the destination. It is the go-to escape tool when surrounded, but it has a 15-second cooldown and consumes 30 stamina, which means it cannot be spammed. Vault Kick performs a leaping kick that deals damage on landing and pushes enemies back 4 meters, making it ideal for creating breathing room in melee clusters. Phase Shift is the most defensive mobility option because it turns the player intangible for 0.75 seconds, allowing them to pass through attacks without taking damage.
| Mobility Skill | Distance | Invuln Window | Cooldown | Stamina | Best For |
|---|---|---|---|---|---|
| Shadow Step | 8m forward | 1.0 sec | 15 sec | 30 | Emergency escape |
| Vault Kick | 6m arc | 0.3 sec | 10 sec | 22 | Melee breathing room |
| Phase Shift | Stationary | 0.75 sec | 12 sec | 18 | Dodging boss telegraphs |
| Roll Dash | 5m directional | 0.5 sec | 6 sec | 15 | Constant repositioning |
| Grapple Pull | 15m to surface | 0.4 sec | 18 sec | 25 | Vertical map sections |
According to community testing on the official A , the strongest mobility pick for tank builds is actually Roll Dash rather than the flashier Shadow Step. Because the 6-second cooldown lets players reposition continuously without dropping their shield uptime. Players who main Roll Dash report roughly 25% fewer deaths in chapter 7 arena fights. Because the constant micro-movements keep them out of telegraphed boss slam zones without burning a full cooldown.
Mobility also feeds into Sil and the Fading World skill breakpoints because several defensive nodes require the player to successfully evade a certain number of attacks before unlocking their bonus. For example, the Adrenaline Recovery node in the Veil tree grants +20% stamina regeneration after 5 successful dodges within 10 seconds, and the Phase Mastery capstone reduces Phase Shift cooldown by 40% after the player has used it 20 times in a single run. These breakpoints reward players who actively use mobility skills rather than hoarding them for emergencies.
Building the Best Defensive Setup: Stat Priorities and Synergies
A working tank build is more than just picking defensive skills; it is about arranging those skills so their cooldowns, stamina costs, and buff windows line up into a smooth combat loop. The recommended approach is to start with a core shield ability as your primary absorb layer, layer one utility skill for crowd control, and finish with a mobility skill for repositioning. From there, you add passive nodes from the Resolve tree to round out your percentage-based damage reduction.
The best skill setup for most players in the current patch looks like this: Aegis Guard as the primary shield, Frost Snare for crowd control, Roll Dash for mobility, and Reactive Ward as a panic button. This combination costs 18 + 12 + 0 + 8 = 38 skill points across three branches, which is achievable by chapter 4 without respeccing. Players who push into chapter 6+ should consider swapping Reactive Ward for Iron Shell. Because the longer shield duration and higher base absorb value scale better against the increased incoming damage.
| Skill Slot | Recommended Pick | Branch Cost | Why It Works |
|---|---|---|---|
| Primary Shield | Aegis Guard | 18 | Highest absorb, immunity window |
| Crowd Control | Frost Snare | 12 | Low stamina, high uptime slow |
| Mobility | Roll Dash | 0 | 6-sec cooldown keeps repositioning constant |
| Panic Button | Iron Shell | 15 | Replaces Reactive Ward for late game |
| Passive Layer | Resolve capstone | 22 | 18% flat damage reduction |
Stat priorities follow a similar logic. Aim for 240+ Fortitude to maximize shield absorb, 180+ Guard Rating to hit the percentage reduction soft cap, and 150+ Agility to keep mobility cooldowns under 7 seconds. Anything beyond 300 Fortitude is wasted because the absorb scaling curve flattens, and the 18 Resolve capstone is the single largest passive damage reduction node in the game, which is why most tank builds treat it as mandatory.
The Sil and the Fading World skill tree planner tools available on community sites let you preview your build before committing points, and they are especially helpful for defensive setups because the interaction between shield duration, cooldown reduction, and stamina regeneration is hard to calculate by hand. Players who plan their tree in advance tend to hit their chapter milestones without respeccing, while those who improvise often end up wasting 20-30 points on dead-end nodes.
Skill Breakpoints, Cooldown Stacking, and Advanced Optimization
Once the basic tank build is functional, the next step is fine-tuning the breakpoints and cooldown interactions that separate a good defensive setup from an elite one. Sil and the Fading World skill breakpoints are specific stat thresholds where a skill's behavior changes dramatically, and hitting them is often the difference between surviving a chapter 8 boss and getting one-shot. The most important breakpoints for tank players are the 40%, 50%, and 60% cooldown reduction marks. Because they align shield cooldowns with the boss attack cycle.
At 40% cooldown reduction, Aegis Guard's 18-second cooldown drops to 10.8 seconds, which lines up perfectly with most boss attack windows. At 50%, it drops to 9 seconds, allowing back-to-back casts if the player manages stamina carefully. At 60%, Aegis Guard becomes a 7.2-second cooldown ability, which lets the player maintain near-100% shield uptime against sustained pressure. Most tank builds aim for at least 50% cooldown reduction by chapter 6. Because anything below that threshold leaves gaps in absorb coverage that elite enemies can exploit.
| Cooldown Reduction | Aegis Guard CD | Bulwark Pulse CD | Shield Uptime | Stamina Pressure |
|---|---|---|---|---|
| 0% | 18.0 sec | 12.0 sec | 62% | Moderate |
| 30% | 12.6 sec | 8.4 sec | 74% | Moderate-High |
| 40% | 10.8 sec | 7.2 sec | 81% | High |
| 50% | 9.0 sec | 6.0 sec | 88% | Very High |
| 60% | 7.2 sec | 4.8 sec | 94% | Extreme |
Stamina management becomes the limiting factor once cooldown reduction exceeds 50%. Because faster cycling means more stamina spent per second. The Resolve capstone helps offset this by granting passive stamina regeneration, and pairing it with the Second Wind passive node gives a burst of 40 stamina every time a shield ability absorbs a critical hit. Together, these two passives sustain the 88%+ shield uptime window that elite tank builds rely on during the longest boss fights.
Synergies are the final layer of optimization, and they are where the best skill setup in the game really shines. The most powerful defensive synergy in the current patch pairs Aegis Guard with the Reflective Plating node, which returns 15% of absorbed damage to nearby enemies as a pulse. Combined with Taunt Shout, this synergy turns the player into a damage-dealing tank that punishes enemies for focusing them, and it is a staple of every high-tier group composition.
Frequently Asked Questions
What are the most important Sil and the Fading World defensive skills for new tank players?
The most important defensive skills for new tank players are Aegis Guard, Frost Snare, and Roll Dash. Aegis Guard provides the highest flat absorb value in the game and includes a 1.5-second immunity window at full charge, while Frost Snare slows grouped enemies by 50% for 6 seconds. Roll Dash is the recommended mobility pick because its 6-second cooldown lets players reposition continuously without breaking shield uptime.
How do I hit the Sil and the Fading World skill breakpoints for cooldown reduction?
The 50% cooldown reduction breakpoint is the most important target for tank builds, and it requires a combination of gear affixes, passive nodes, and one consumable buff. Most players hit it by chapter 6 using 25% from gear, 15% from the Swift Recovery node, and 10% from a major cooldown rune. The 60% breakpoint requires a dedicated cooldown-rune slot and is mostly used by endgame groups.
Can I respec defensive skills if my build is not working?
Yes, players can respec skill points at the Mirror of Reflection located in the Hub area, and the first respec per playthrough is free. Subsequent respecs cost 500 gold per use, which adds up quickly in New Game+ runs. Planning the build with a Sil and the Fading World skill tree planner before committing points saves gold and avoids wasting early-chapter resources on dead-end nodes.
What is the best Sil and the Fading World best skill setup for solo tank play?
The best solo tank setup is Aegis Guard, Frost Snare, Roll Dash, and the Resolve capstone passive. This combination gives solo players layered defense, crowd control, mobility, and percentage-based damage reduction without requiring co-op support. Players who prefer a more aggressive playstyle can swap Frost Snare for Taunt Shout to pull threat off summoned companions.
Do Sil and the Fading World skill synergies change between chapters?
The core synergies do not change between chapters, but enemy damage scaling increases by roughly 18% per chapter, which means some early-game synergies fall off in the late game. The Aegis Guard plus Reflective Plating synergy remains strong throughout the entire game because it scales with absorb value, which scales with Fortitude. The DPS skills breakdown explains which offensive synergies scale similarly for hybrid builds.