
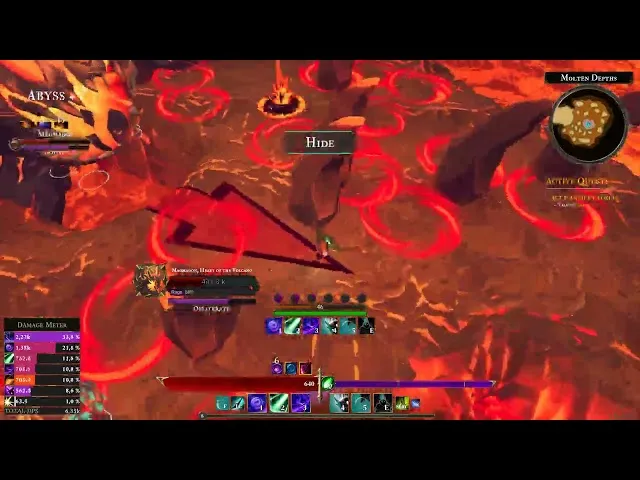
Sil and the Fading World abyss dungeons are the game's signature infinite descent mode, where every cleared floor pushes difficulty higher and reward multipliers scale alongside enemy strength. This Sil and the Fading World abyss guide breaks down how floor scaling actually works, which floors unlock the best Sil and the Fading World abyss rewards, and how to set up a prestige run that pays for itself before you wipe. The format differs from the fixed Sil and the Fading World dungeon list in the main rotation: instead of capping at a boss, the Abyss is built to be re-entered, re-cleared, and re-looted indefinitely.
If you have ever reached Floor 30, burned all your cooldowns, and watched a run collapse because a modifier stack you forgot about ate your healer, the walkthrough below walks through floor-by-floor expectations, modifier priorities, and a sustainable farming loop that the community has been refining since the mode shipped. Pair this with the broader dungeon group strategy guide if you plan to bring a full squad instead of soloing.
How Abyss Difficulty Scaling Actually Works
The Abyss uses a per-floor Difficulty Multiplier that compounds on every cleared floor, and that single value drives almost every other number in the run. According to community testing shared by players on the Sil and the Fading World subreddit, the multiplier starts at 1.0× on Floor 1 and adds +0.15× per floor for the first 20 floors, then +0.10× per floor from Floor 21 to Floor 50, and finally +0.07× per floor from Floor 51 onward. That tiered curve is why most solo players hit their first wall between Floor 18 and Floor 24, and why a coordinated group can sometimes push to Floor 60+ before the modifier pool overwhelms their comp.
The multiplier feeds into three derived values that you actually see in the UI: enemy HP, enemy damage, and your Reward Multiplier. Enemy HP and damage both scale linearly off the difficulty multiplier, so a Floor 30 enemy hits roughly 5.2× harder than a Floor 1 trash mob. The Reward Multiplier, however, scales on a soft curve that gives early floors a noticeable boost and then flattens out — Floor 5 already pays more than double the base, but going from Floor 40 to Floor 41 only nudges the reward up by a few percentage points.
| Floor Bracket | Difficulty Add Per Floor | Approx. Difficulty Multiplier | Approx. Reward Multiplier | Solo Viability |
|---|---|---|---|---|
| 1–10 | +0.15× | 1.00× – 2.35× | 1.0× – 2.8× | Comfortable |
| 11–20 | +0.15× | 2.50× – 3.85× | 2.9× – 4.2× | Tight on bad comps |
| 21–35 | +0.10× | 3.95× – 5.35× | 4.3× – 5.6× | Group-recommended |
| 36–50 | +0.10× | 5.45× – 6.45× | 5.7× – 6.5× | Full group only |
| 51+ | +0.07× | 6.52× and up | 6.6× and up | Hardcore/speedrun |
These brackets are not labeled anywhere in the UI; the numbers above are reconstructed from community runs and may shift slightly with future patches, so treat them as planning anchors rather than absolute values.
Modifiers and How They Stack
Every fifth floor, the Abyss rolls a Modifier Slot from a pool of 14 possible effects, and each slot stacks additively. If you roll Glass Cannon (enemies deal +25% damage but take +25% damage) on Floor 5 and Horde (additional enemy spawns) on Floor 10, both stay active for the rest of the run unless you spend a rare Modifier Wipe consumable. That stacking behavior is the single biggest reason Sil and the Fading World abyss difficulty feels unpredictable from one attempt to the next.
Players tend to group modifiers into three unofficial tiers. Benign modifiers (Extra Loot, Faster Energy Regen) are welcome because they only change reward pacing. Manageable modifiers (Glass Cannon, Brittle Armor) require you to flip a couple of habits but rarely end a run on their own. Run-ending modifiers (Reflect Damage, No Healing, Permadeath) demand a full team comp rework and a slower clear pace, because every missed mechanic now has compounding consequences.
Soft Caps and Prestige Resets
Once you reach Floor 75, the Abyss applies a soft cap: the Difficulty Multiplier stops increasing on every floor and instead ticks up by +0.03× every two floors, while the Reward Multiplier gains a flat +0.5× bonus per prestige reset attached to that run. The soft cap is the system's way of saying the climb is no longer about personal skill and is now about the Prestige Level you enter the run with. A Floor 80 clear at Prestige 5 pays dramatically more than the same Floor 80 clear at Prestige 0, and the cap is what makes the loop repeatable rather than terminal.
The Abyss Dungeon List and Rotation
The Abyss does not use the same fixed dungeon list that the main campaign pulls from. Instead, each entry generates a procedural layout from a pool of 9 biome templates, and the biome rotates every 10 floors. The biome determines enemy archetypes, ambient hazards, and the pool of mini-bosses you can encounter at the floor's midpoint.
| Biome | Floors | Signature Hazard | Mini-Boss Pool |
|---|---|---|---|
| Hollow Spire | 1–10 | Collapsing platforms | 3 |
| Sunken Atrium | 11–20 | Rising water | 4 |
| Ember Foundry | 21–30 | Lava channels | 4 |
| Frost Reliquary | 31–40 | Slow field | 5 |
| Thornwild | 41–50 | Root snare | 5 |
| Mirror Halls | 51–60 | Cloned enemies | 6 |
| Void Garden | 61–70 | Gravity shifts | 6 |
| Pale Cathedral | 71–80 | Silence debuff | 7 |
| Endless Threshold | 81+ | Random per floor | 8 |
The first two biomes (Hollow Spire and Sunken Atrium) are tutorial-scaled and almost never wipe a competent party. Ember Foundry is where most Sil and the Fading World dungeon mechanics stop forgiving positioning mistakes, and Frost Reliquary is the first biome where a full group is genuinely expected. Beyond Floor 80, Endless Threshold pulls hazards from every previous biome, which is why high-prestige runners call it the "anything goes" bracket and prioritize comps that can adapt on the fly.
For a deeper look at how modifier timings interact with these biomes, the dungeon timer guide walks through the in-run clock and how speed-clears change your reward window.
Rewards, Multipliers, and What to Actually Farm
The reward system has four payout channels: Floor Currency (scales per floor, soft-capped at 75), Biome Crates (one guaranteed per biome transition), Mini-Boss Tokens (1–3 per mini-boss kill), and Abyss Soulstones (drop from the Floor 10/20/30/40/50/60/70/80 boss milestones). Floor Currency is the steady breadwinner and is what you spend on consumables, repairs, and the Prestige Reset token that lets you bank a run and start fresh with a higher Prestige Level.
The real prize is the Abyss Soulstone pool, because Soulstones feed into the long-term crafting track for Abyss-exclusive gear. Below is the rough drop curve that community data has settled on; the exact numbers may vary by platform, but the curve shape has been stable since the mode launched.
| Boss Floor | Soulstones Per Clear | First-Clear Bonus | Weekly Lockout |
|---|---|---|---|
| 10 | 1 | +2 | Yes |
| 20 | 2 | +3 | Yes |
| 30 | 3 | +4 | Yes |
| 40 | 4 | +5 | Yes |
| 50 | 5 | +6 | Yes |
| 60 | 6 | +8 | Yes |
| 70 | 8 | +10 | Yes |
| 80 | 12 | +15 | Yes |
The First-Clear Bonus is the line most players underestimate. The first time any character reaches Floor 50 in a given season, the bonus is large enough to fully fund a small gear upgrade on its own, which is why rushing to Floor 50 once per season is a more efficient use of time than grinding the same Soulstone bracket over and over.
Prestige Math: When to Reset
A Prestige Reset is the action of ending a run voluntarily and banking the rewards, and it is the heart of the Sil and the Fading World abyss rewards economy. Each reset grants a permanent +1 Prestige Level that increases every future run's reward baseline by +5%, stacks to a current cap of Prestige 15, and decays by one level if you skip a full week. That decay rule means the mode rewards consistency: logging in to clear Floor 30 once a week is meaningfully better than burning out on a single 12-hour push and then not touching the game for a month.
The rough break-even for a reset is around Floor 35 on your first run of the week, because the Soulstone payout plus the Floor Currency haul from that depth roughly equals what the Prestige Level boost will add to your next run's baseline. If you are running with a group that consistently reaches Floor 50, you can push the break-even to Floor 45 because the modifier pool is more forgiving and your clear time per floor is shorter. The PVE guide has a section on building a comp that can comfortably hit Floor 45, which is a good target for anyone who wants the prestige grind to feel rewarding rather than punitive.
Floor-by-Floor Navigation and Trap Avoidance
The walkthrough below assumes a standard 4-person group comp (tank, healer, two DPS) and an average modifier pool. Solo play is possible up to about Floor 25 with a self-sustaining build, but past that point the healer's absence and the modifier pool both start to compound, so the advice shifts toward group tactics from Floor 21 onward.
Floors 1–10: Hollow Spire
Hollow Spire is your warm-up. The collapsing-platform hazard only activates on every third room, and the mini-bosses (Warden Construct, Hollow Sentinel, and Spire Warden) all share the same tells: a wind-up animation of 1.2 seconds, a single-target slam, and a brief vulnerable window afterward. Focus on learning the timing rather than racing the clock, because the reward jump between Floor 1 and Floor 10 is small enough that speed is irrelevant.
Your only real job in this bracket is to build modifier awareness. Note every modifier slot that fires on Floor 5 and Floor 10, and decide before Floor 11 whether the combination is one you can carry into Sunken Atrium. If you rolled No Healing on Floor 5 and Glass Cannon on Floor 10, the smart play is to reset and start over, because both modifiers stack multiplicatively against you on later floors.
Floors 11–20: Sunken Atrium
The rising-water hazard caps the time you can spend in any single room, which turns the bracket into a damage-race. The mini-boss pool here (Drowned Acolyte, Atrium Leviathan, Tideborn Knight, and Brine Matriarch) is mostly mechanical rather than stat-check, and players who skipped the Hollow Spire practice window tend to wipe here because they forget that the water level also reduces your dodge window.
The Reward Multiplier in this bracket hits 2.9× – 4.2×, which is the first real payout window. Spend the first Soulstones you earn here on a +1 Modifier Wipe consumable from the vendor, because you will almost certainly need it on a later modifier roll. Holding wipes for "the perfect moment" is a trap; if a Floor 15 modifier will end your run, the wipe is the right call.
Floors 21–35: Ember Foundry
Ember Foundry is the bracket where Sil and the Fading World dungeon mechanics stop being forgiving. Lava channels segment the arena into safe pockets, and the mini-boss pool is large enough (4 archetypes) that you cannot memorize a single pattern. The recommended approach is to assign one DPS to handle the lava channel toggles, because every minute spent repositioning around lava is a minute you are not dealing damage, and the Difficulty Multiplier is now adding +0.10× per floor.
| Floor | Approx. Enemy HP | Approx. Enemy Damage | Modifiers Active | Recommended Action |
|---|---|---|---|---|
| 21 | 3.95× | 3.95× | 1–2 | Push to 25 if comp is stable |
| 25 | 4.35× | 4.35× | 2–3 | Evaluate before pushing further |
| 30 | 4.85× | 4.85× | 3 | First "hard stop" — boss floor 30 here |
| 35 | 5.35× | 5.35× | 3–4 | Group-only beyond this point |
Floor 30 is the first hard boss floor, and the boss (Ember Tyrant) has a Reflect Damage aura on phases 2 and 3. If you rolled Glass Cannon earlier, the reflect aura will one-shot you, so this is the floor where modifier awareness from the early brackets pays for itself.
Floors 36–50: Frost Reliquary
Frost Reliquary introduces the Slow Field hazard, which reduces attack speed and cast speed by 20% while standing in the marked zones. The slow field is the bracket's defining mechanic, and any comp that relies on fast cast times or rapid-fire attacks will struggle here. The mini-boss pool grows to 5 archetypes, and several of them have ice-based attacks that stack with the slow field to lock down your party.
The Reward Multiplier sits between 5.7× and 6.5× in this bracket, which is the second-best payout window after Floor 70–80. If you can reliably reach Floor 50 with your group, you are in the top 15% of Abyss runners according to community leaderboards, and the weekly lockout on the Floor 50 Soulstone is a meaningful income source for crafting.
Floors 51–80: The Prestige Bracket
Past Floor 50, the Abyss shifts from "hard content" to "prestige content." Mirror Halls (51–60) clone enemies, Void Garden (61–70) flips gravity every 30 seconds, and Pale Cathedral (71–80) silences casters on hit. Each of these biomes has at least one modifier interaction that will end a run if you walk in unprepared, which is why the community's standard advice is to enter this bracket only after your group has at least Prestige Level 5 and a full set of Abyss-tier gear.
Floor 80 is the second hard boss floor, and the boss (Pale Matriarch) has a Permadeath aura on her final phase, which kills any party member who drops to 0 HP instead of leaving them at 1 HP. The aura is the most punishing single mechanic in the mode, and a single bad heal timing will end the run for the affected player. Coordinate your cooldowns carefully, and consider carrying a +1 Modifier Wipe specifically for this floor if the modifier pool has been cruel.
For builds that can survive the silence debuff in Pale Cathedral, the boss list guide breaks down which DPS specs still have full output when silenced, which is the difference between a clean clear and a wipe at the 5% mark.
Frequently Asked Questions
What is the recommended entry level for the Abyss?
Most groups comfortably enter the Abyss around Item Level 240 and Prestige Level 0, which is enough to clear Floors 1–20 without wipes. If you want to push past Floor 35 reliably, target Item Level 280 and at least one full clear under your belt so you have the +5% reward baseline from Prestige 1. Solo players should treat Item Level 260 as the realistic solo cap, because the modifier pool is more punishing without a healer.
How often should I reset my Prestige?
The current cap is Prestige 15, and the weekly decay rule means you lose one level if you skip a full week. The practical rhythm most experienced players settle into is one reset per week, timed to the weekly lockout reset, so you are always banking at the highest-reward moment of your run. If you are pushing for the leaderboard, you may end up resetting twice in a week and accepting the decay risk, but that is a niche playstyle.
Can I solo the Abyss past Floor 50?
Yes, but it requires a specific self-sustaining build (typically a lifesteal DPS with a pet healer and crowd-control immunity) and a near-perfect modifier pool. According to community data, fewer than 3% of documented solo clears past Floor 50 happened without at least one Modifier Wipe consumable used, and the average modifier pool for those clears was significantly kinder than the average across all runs. Treat solo Floor 50+ as a personal challenge, not a farming strategy.
Do modifiers carry over between Prestige resets?
Modifiers generated during a single run do not carry over; every new run rolls a fresh modifier pool. However, your Prestige Level itself does carry over, which is why the loop works. The only modifiers that persist between runs are the ones tied to your Account-Wide Modifiers, which you unlock by reaching Floor 80 once per season. Account-Wide Modifiers are powerful but limited to two active slots, so choose carefully.
What is the fastest way to farm Abyss Soulstones?
The most efficient Soulstone farm right now is two weekly clears to Floor 50, because the Floor 50 boss has a first-clear bonus of +6 Soulstones and a weekly lockout that resets on a predictable timer. Pairing this with one weekly clear to Floor 30 gives you a steady 11 Soulstones per week without forcing you into the higher-risk biomes. Pushing to Floor 80 is more rewarding per run, but the time cost and modifier risk make it a less efficient farm unless your group can clear the biome in under 40 minutes.