
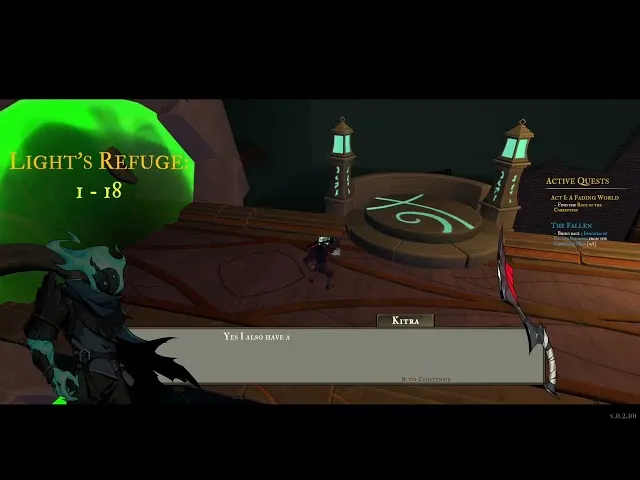
What Awaits You Inside Sil and the Fading World Dungeons
Sil and the Fading World dungeon enemies form one of the most punishing rosters in the game, and the deeper you push, the more aggressive the encounter design becomes. Every dungeon features layered enemy archetypes, environmental hazards, and a final boss that can wipe an unprepared party in under ten seconds. Understanding the threat ladder before you queue up is the difference between a smooth clear and a full inventory of broken gear.
This guide breaks down the full dungeon enemy taxonomy, the boss mechanics behind each encounter, and the positioning rules that keep a group alive when the infinite scaling begins. Dungeons in Sil and the Fading World don't just get harder by inflating stats — the encounter design changes at every ten floors, and the late-game abyss loops throw new combinations at you every pull. The dungeon tips below are drawn from community testing and player-reported clear data, so you get a realistic picture of what works instead of theory-crafting assumptions.
Before you walk in, anchor your expectations around three things: enemy types and their telegraph windows, the boss phase structure unique to each dungeon, and the Sil and the Fading World dungeon loot curve that determines whether a run was actually worth the time investment. The next section gives you a full enemy table, followed by boss-by-boss mechanics and the build considerations that matter most when the abyss infinite scaling kicks in.
Core Dungeon Enemy Types and Threat Tiers
Every dungeon in Sil and the Fading World mixes six core enemy archetypes, and each one punishes a different defensive mistake. The table below summarizes the basic threat profile, the telegraph window you get before the hit lands, and the recommended counter.
| Enemy Type | Primary Role | Telegraph Window | Recommended Counter | Floor Tier |
|---|---|---|---|---|
| Hollow Crawler | Front-line pressure | 1.2 seconds | Dodge back, punish during recovery | Floors 1-20 |
| Ash Revenant | Burst damage from mid-range | 0.8 seconds | Bait the lunge, sidestep right | Floors 5-30 |
| Veiled Sentry | Ranged caster, zones corridors | 2.0 seconds | Close distance, interrupt cast bar | Floors 10-40 |
| Cinder Brute | Heavy stagger, enrage at 50% HP | 1.5 seconds | Stagger break during the wind-up | Floors 15-50 |
| Pale Acolyte | Healer, revives downed adds | 1.0 seconds | Prioritize kill, ignore adds | Floors 20-60 |
| Eclipse Sentinel | Mini-boss, dual-phase at 30% HP | 1.8 seconds | Save cooldowns for phase two | Floors 30+ |
The Hollow Crawler is your baseline enemy and the first one you encounter in the Sunken Atrium dungeon. Crawlers pressure the front line with quick claw swipes that chain into a three-hit combo if you stand still too long. The recommended counter is simple: dodge back on the first hit, then punish the recovery animation with one or two fast attacks. The 1.2-second telegraph gives you enough room to react even on laggy connections, which makes Crawlers the easiest enemy to learn the dodge rhythm on.
The Ash Revenant is where most new players start wiping in Sil and the Fading World dungeon enemies. Revenants teleport behind the target before unleashing a three-hit burst that can chunk 40% of your health bar on later floors. The 0.8-second telegraph is intentionally tight — bait the lunge by moving in, then sidestep right when the animation starts. Strafing left gets you clipped by the second hit, which is the most common death cause in community clear logs.
Veiled Sentry casters stay at the back of the room and lock down corridors with Shadow Bolts that hit hard in groups. The 2.0-second cast bar is your window. Close the distance before the cast finishes, then interrupt with a stagger skill. Letting a Sentry finish a cast in a tight room is one of the fastest ways to lose a party in the dungeon group strategy breakdown of high-level runs.
Cinder Brutes look like a slow enemy, but their wind-up animation is misleading. The 1.5-second telegraph includes a shoulder dip that telegraphs a Ground Slam capable of one-shotting non-tank classes below floor 30. Stagger the Brute during the wind-up using a heavy attack or a dedicated stagger skill. Once staggered, you get a free 3-second punish window.
Pale Acolytes are the dungeon enemy you ignore at your own risk. They never attack you directly, but they spend the entire pull channeling revives on downed adds. The 1.0-second cast bar means you have a narrow window to interrupt, and skipping an Acolyte to kill adds first usually results in the adds getting rezzed mid-fight. Always kill the Acolyte first, then clean up the rest.
The Eclipse Sentinel is the mini-boss archetype that gates most dungeon progression. Sentinels have a standard pattern through 70% HP, then switch to a dual-phase rotation at the 30% HP mark. Save your cooldowns for phase two, and treat the first phase as a setup window where you learn the attack order. According to player-reported data from high-level runs, Sentinels rotate between three attacks in phase one and four attacks in phase two, which is a significant difficulty spike that catches solo players off guard.
Dungeon Boss Mechanics and Gimmick Countermeasures
Sil and the Fading World dungeon bosses follow a phase-based design, and every boss has a unique enrage or transition trigger. The table below maps out the core boss roster, the floor where each one appears, and the mechanic you need to respect.
| Boss | Dungeon | Floor | Health Pool | Key Mechanic | Recommended Role Comp |
|---|---|---|---|---|---|
| The Hollow Magistrate | Sunken Atrium | 10 | ~120,000 | Summons two add waves at 60% and 30% HP | Tank + 2 DPS + Healer |
| Cinder Wraith | Ember Vault | 20 | ~180,000 | AoE burn puddles that persist for 8 seconds | 2 DPS + 2 Healers |
| The Pale Curator | Frost Reliquary | 30 | ~250,000 | Steals one buff per phase change | Tank + Healer + 2 DPS |
| Eclipse Tyrant | Abyssal Threshold | 50 | ~400,000 | Mirror-damage shield until add is killed | Tank + 2 DPS + Healer |
| Fading Sovereign | Endless Abyss | 70+ | Scales with floor | Four-phase rotation, new attack each phase | Full balanced comp |
The Hollow Magistrate is your first real boss check in Sil and the Fading World dungeon bosses. The fight is straightforward on the surface — the Magistrate telegraphs a heavy slam and a wide-cleave swipe — but at 60% HP, he summons two Hollow Crawlers, and at 30% HP, he summons a Veiled Sentry alongside two more Crawlers. Kill the adds before re-engaging the boss, or the Sentry will zone you out of the punish window.
The Cinder Wraith is where healer pressure starts to matter. The Wraith drops persistent burn puddles across the arena every 12 seconds, and standing in one ticks for roughly 4% of max HP per second. The mechanic forces constant repositioning, which means your healers can't plant behind a pillar. Two healers is the recommended comp here because the damage intake is too high for a single healer to keep up with during the burn puddles.
The Pale Curator introduces a debuff-stealing mechanic that punishes over-stacking buffs. At every phase change (75%, 50%, 25%), the Curator strips one buff from every player in the arena. If you walk in with a full buff bar, you'll lose most of your setup at the first phase change. Spread your buffs out, or use self-buffs that you can re-apply quickly after each steal.
The Eclipse Tyrant is the first boss where the dungeon enemies and boss design merge. The Tyrant has a mirror-damage shield that reflects 100% of incoming damage back to the attacker for the first 30 seconds. To break the shield, you have to kill the Eclipse Acolyte add that spawns at the boss's back. The Acolyte has about 60,000 HP and dies in 8-10 seconds of focused DPS. Once the shield drops, the Tyrant becomes a sustained-damage race against a 90-second enrage timer.
The Fading Sovereign is the end-game boss, and according to the official Sil and the Fading World Steam page, this is the encounter that defines the infinite scaling experience. The Sovereign has four phases, and each phase introduces a new attack that wasn't telegraphed in earlier phases. The boss HP scales with the floor you enter on, which is the core mechanic behind Sil and the Fading World infinite scaling. A floor 70 Sovereign has roughly 600,000 HP, while a floor 100 Sovereign sits closer to 1.2 million.
Best Dungeon Builds for Each Threat Tier
Your build matters more in Sil and the Fading World dungeon enemies content than in any other game mode, because the infinite scaling punishes defensive stat-stacking without offense. The best dungeon builds split into three archetypes: pure damage, stagger-locked, and survivability-tuned. The right pick depends on your role and the dungeon you're queuing for.
| Build Archetype | Best Dungeon | Primary Stat | Core Skill | Survivability | Damage Output |
|---|---|---|---|---|---|
| Pure DPS | Abyssal Threshold | Strength / Intelligence | Execution Strike | Low | Very High |
| Stagger-Lock | Ember Vault | Dexterity | Pinning Volley | Medium | High |
| Tank Bruiser | Sunken Atrium | Vitality + Strength | Guardian Bash | Very High | Medium |
| Buff Support | Frost Reliquary | Wisdom | Rallying Aura | High | Low |
| Hybrid Cleanser | Endless Abyss | Balanced | Purifying Burst | Medium | Medium |
The Pure DPS build is the go-to for the Abyssal Threshold and any floor above 50. The core loop revolves around the Execution Strike skill, which deals bonus damage to enemies below 25% HP. On trash pulls, you build meter on adds, then burst down the priority target for the execute bonus. The downside is survivability — you have to dodge mechanics perfectly, and one missed dodge usually means death. For more on the math behind Pure DPS, the best class tier list covers how each class scales with this build.
The Stagger-Lock build uses the Pinning Volley skill to keep enemies locked in their stagger animation, which extends your punish window by roughly 1.5 seconds per proc. This is the most consistent build for the Ember Vault because the Cinder Wraith's burn puddles require frequent repositioning, and the extra stagger duration lets you get a full rotation in before the next puddle drops.
The Tank Bruiser build is what solo players default to in the Sunken Atrium. Guardian Bash gives you a 30% damage reduction shield on a 20-second cooldown, which is enough to survive most one-shot mechanics if your timing is right. The damage output is lower, but you can solo most pulls without a healer, which speeds up farming runs significantly.
The Buff Support build is mandatory for any group running the Frost Reliquary at floor 30+. The Rallying Aura skill grants nearby allies a 15% damage bonus and 10% damage reduction for 10 seconds. The Pale Curator strips buffs every phase change, so the Support player re-applies the aura after each strip, which is the difference between a clean clear and a slow bleed-out.
The Hybrid Cleanser build is the most versatile option for the Endless Abyss. The Purifying Burst skill removes one debuff from each ally and deals moderate damage in a small AoE. The Cleanser handles the random debuffs that the Fading Sovereign applies in phase three, and the moderate damage keeps the build viable even when no cleansing is required.
Environmental Hazards and Group Positioning Rules
Sil and the Fading World dungeon enemies are only half the threat. The other half comes from the environmental hazards embedded in each dungeon, and the way these hazards interact with enemy positioning is what separates a good run from a failed one.
The three most common hazards are Collapsing Floors, Elemental Pools, and Lethal Fog. Each dungeon uses a different combination, and the worst-case scenario is a dungeon that layers two hazards on top of a hard enemy pull.
| Hazard Type | Effect | Mitigation | Most Common Dungeon |
|---|---|---|---|
| Collapsing Floors | Instant death if standing on the marked tile | Move off the marked tile within 3 seconds | Sunken Atrium |
| Elemental Pools (Fire) | 4% max HP per second, 8-second duration | Step out before the pool expands | Ember Vault |
| Elemental Pools (Frost) | 30% slow, 6-second duration | Use a cleanse skill or wait it out | Frost Reliquary |
| Lethal Fog | 1% max HP per second, fills from corridor entrances | Hold at the inner room, block chokepoint | Abyssal Threshold |
| Curse Runes | Random debuff on contact | Step over only when the rune is dim | Endless Abyss |
The Collapsing Floor hazard in the Sunken Atrium is the most common cause of one-shot deaths in early dungeon runs. The floor tiles flash red for 1.5 seconds before they collapse, but the visual cue is easy to miss when you're focused on the enemy in front of you. According to community testing, the most reliable counter is to circle-strafe around the marked tile while continuing your rotation, rather than fully disengaging the enemy.
The Elemental Pools in the Ember Vault and Frost Reliquary force the group to reposition every 12-15 seconds. Fire pools do percentage-based damage, which means they hit tanks and DPS equally, and the 8-second duration means you can't simply wait them out. Frost pools don't do damage but apply a 30% slow that lasts 6 seconds, which is enough to lock you in place for the next enemy attack. For a deeper look at how positioning and healing cooldowns sync up, the dungeon timer and healing guide has the rotation breakdowns.
Lethal Fog in the Abyssal Threshold is the first hazard that rewards defensive positioning over offensive rotation. The fog fills the dungeon from the entrance corridor inward, and the only safe zone is the inner room. If your group is spread out chasing adds, the fog will catch the outermost player first. The fix is to fall back to the inner room every time the fog warning sound plays, and only re-engage the enemy on the inner half of the arena.
The Curse Runes in the Endless Abyss are the most unpredictable hazard. The runes apply a random debuff on contact — slow, silence, damage vulnerability, or a healing debuff — and the only visual cue is a dim glow on the floor. Stepping over a rune is safe when the glow is dim, and dangerous when the glow is bright. Since the debuffs are random, the recommended counter is to have one designated Cleanser player who handles debuff removal for the group.
Infinite Scaling, Abyss Loops, and the Endgame Loop
The infinite scaling system in Sil and the Fading World is the endgame grind, and it's where Sil and the Fading World abyss infinite content lives. Once you clear the floor 50 boss in the Abyssal Threshold, the dungeon unlocks an endless mode where floors continue generating indefinitely. The scaling follows a predictable curve, and the difficulty changes in measurable ways at every ten floors.
| Floor Range | Difficulty Tier | Enemy HP Modifier | Boss HP Modifier | Loot Tier | Recommended Group Size |
|---|---|---|---|---|---|
| 1-10 | Normal | 1.0x | 1.0x | Tier 1-2 | Solo or Duo |
| 11-30 | Hard | 1.5x | 1.8x | Tier 2-3 | Duo or Trio |
| 31-50 | Elite | 2.5x | 3.0x | Tier 3-4 | Full Group of 4 |
| 51-70 | Abyss | 4.0x | 5.0x | Tier 4-5 | Full Group of 4 |
| 71-100 | Deep Abyss | 6.5x | 8.0x | Tier 5-6 | Full Group + Coordinated Comp |
| 100+ | Infinite | 10.0x+ | Scales per floor | Tier 6+ (Ascended) | Hardcore Coordinated Only |
The enemy HP modifier doubles roughly every 20 floors, while the boss HP modifier scales more aggressively. By floor 100, a single boss pull can take 3-4 minutes of sustained DPS, which is where gear and build optimization start to matter more than mechanical execution. The Sil and the Fading World infinite scaling curve is steep but not unfair — every floor tier has a corresponding gear breakpoint, and players who clear their inventory of outdated loot at each tier see a noticeable power spike.
The Sil and the Fading World abyss infinite loop works like this: you enter the Abyssal Threshold at your current highest clear floor, and the dungeon generates a fresh layout every run. Every 10 floors, you face an Eclipse Tyrant mini-boss, and every 50 floors, you face a Fading Sovereign full boss. The dungeon loot at floor 50 matches Tier 4-5 gear, and the floor 100 drops sit in the Tier 5-6 (Ascended) bracket, which is the current end-game ceiling.
The Sil and the Fading World best dungeon builds for infinite scaling are not the same as the builds you use for the first clear. The Pure DPS build becomes mandatory above floor 70 because the boss enrage timers tighten with each tier, and only the burst damage from Execution Strike keeps you under the timer. The Hybrid Cleanser build becomes the second slot because the Curse Rune frequency increases with floor depth, and you need dedicated cleansing for the random debuffs.
The Sil and the Fading World dungeon loot table follows a strict drop rate curve: Tier 1-2 gear drops at 80% on early floors and falls to under 5% by floor 50. Tier 5-6 Ascended gear starts dropping at floor 70 with a 2% rate and climbs to roughly 8% at floor 100. According to community testing, the average time investment for a single Ascended drop at floor 100 sits around 45-60 minutes of focused farming, which is why most players target specific floor ranges rather than pushing for the highest possible clear.
Frequently Asked Questions
What is the hardest Sil and the Fading World dungeon enemy to deal with?
The Cinder Brute is the most punishing dungeon enemy because the Ground Slam one-shots non-tank classes below floor 30 and the wind-up animation is deceptive. Stagger the Brute during the 1.5-second telegraph using a heavy attack, and you get a free 3-second punish window before the next slam. Most wipes on Brute pulls come from players who try to out-DPS the slam instead of staggering it.
How does Sil and the Fading World infinite scaling work after floor 100?
Past floor 100, the modifiers stop doubling on a fixed curve and instead scale per-floor. Enemy HP gains roughly 8% per additional floor, and boss HP gains about 10% per floor. The Sil and the Fading World abyss infinite loop continues indefinitely, but the practical ceiling for most coordinated groups sits around floor 120-130 because the gear breakpoints stop keeping pace with the modifier curve above that range.
Which dungeon gives the best loot in Sil and the Fading World?
The Endless Abyss at floor 100+ is the best source of Tier 5-6 Ascended gear, with a drop rate of roughly 8% per boss clear. For players who can't push that deep, the Abyssal Threshold at floor 50-70 offers Tier 4-5 gear with a more forgiving 12-15% drop rate. The dungeon farming breakdown covers how to optimize your route for each loot tier.
What is the best solo build for early dungeon clears?
The Tank Bruiser build is the most consistent solo option because Guardian Bash gives you a 30% damage reduction shield on a 20-second cooldown, which lets you survive one-shot mechanics without a healer. The damage output is lower than Pure DPS, but the survivability advantage makes up for it on the first 20 floors where your gear score is still low.
Do dungeon bosses in Sil and the Fading World have enrage timers?
Yes, every boss from the Eclipse Tyrant onward has a 90-second enrage timer that doubles the boss damage output and removes all your defensive cooldowns. The Fading Sovereign in the Endless Abyss has a 120-second enrage timer that adds a fourth attack to its rotation. The most reliable counter is to track your burst windows and save your cooldowns for the enrage, rather than spending them on the opening phase.